


Frequently Asked Questions
-
How to disable your extension?
-
To disable any of our extensions, please, follow this algorithm:
1. Edit app/etc/modules/Neklo_XXX.xml file (where XXX stands for the extension name/code).
2. Change "true" to "false".
3. Clear the cache.
As soon as you have done it the extension is disabled completely, meaning it no longer affects any Magento functionality.
-
How to install a Magento extension by NEKLO?
-
1. 1. Disable Compilation mode if it is enabled (System - Tools - Compilation).
2. Unpack the archive purchased from our Magento Store and copy the contents of the ‘extension’ folder to the root folder of your Magento installation.
3. Log out from Magento Admin panel if you are logged in and then log back.
4. Clear the cache. If Cache Control is enabled in Magento go to ‘System > Cache Management’ section, select ‘Refresh’ under ‘All Cache’ drop-down menu and press ‘Save Cache Settings’.
5. Go to ‘System > Configuration > NEKLO tab > Extensions & Contact’ section and check the list of extensions installed for the name of your purchased extension. If it is in the list the installation is complete.
-
How to translate an extension?
-
There are two options for translating your Magento extension.
1. Please open app/locale/en_US/ Neklo_XXX.csv, copy it to your locale folder, for example to app/locale/de_DE/ Neklo_XXX.csv and change the wording after the "," so the line will look like "Product review","Testbericht".
2. If there are the necessary language packs installed, you can use inline translation. To do that, please, go to admin/system/configuration/ developer, choose the storeview you want to translate and enable inline translation for it. Then go to the front end, select text and translate.
-
How to uninstall the extension?
-
To completely uninstall any of our extensions, first start from disabling it. To disable the extension, please follow the next steps:
1. Edit … file (where XXX stands for the extension name/code).
2. Change "true" to "false".
3. Clear the cache.
At this point the extension is completely disabled and is not visible for Magento.
Now you can safely remove the extension files, although it is not necessary.
-
How to update NEKLO extension?
-
1. Log in into your account
2. Download the extension (it will be always the latest extension version)
3. Unpack the downloaded folders
4. Disable the Compilation mode in Magento
5. Upload the overwriting existent files of our extensions to Magento root folder (please note that if you customized the files of our extension, the customizations will be overwritten)
6. Refresh site cache (if it's enabled)
7. Re - run the Compilation mode
-
I’m getting this error: SQLSTATE[23000]: Integrity constraint violation. What shall I do?
-
Next time, please, disable the compilation mode prior to uploading the extension files to your server.
And now, please, follow these steps:
1. Open app/etc/local.xml
2. Replace
<disable_local_modules>false</disable_local_modules> with
<disable_local_modules>true</disable_local_modules>
3. Log in to admin panel and disable the compilation.
4. Revert the changes in the local.xml
5. Clear the cache.
-
I’m running several stores, shall I buy a separate extension for each of them or it is possible to use one extension?
-
You can use one extension per one live Magento installation. It means that if you run multiple stores on same one Magento installation, you just buy our extension once and then use it for all your stores.
In case your stores run on separate live Magento installations, you need to buy an extension for each of them.
-
There’s a "404 Not Found" error when opening configuration page.
-
Please, log out and then log back into the backend, so Magento can refresh permissions.
Secure your Magento workplace
Two-Factor Authentication
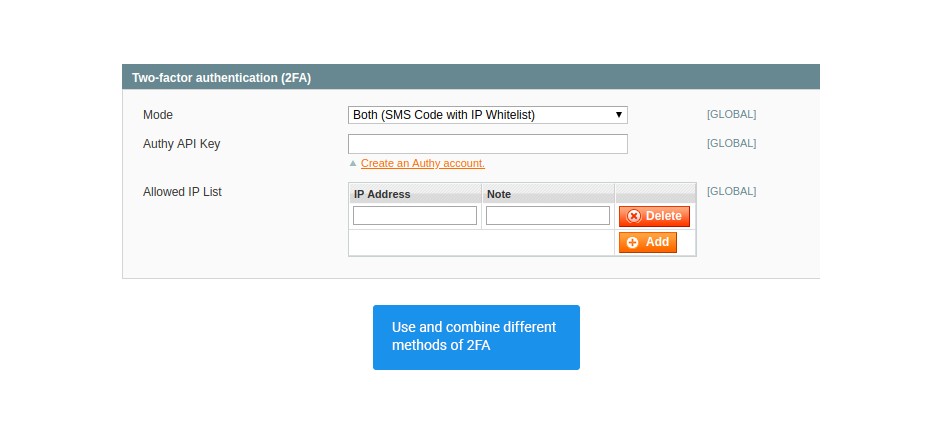
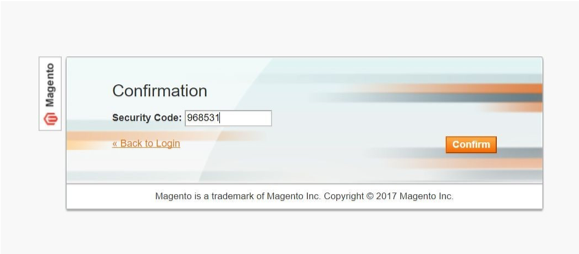
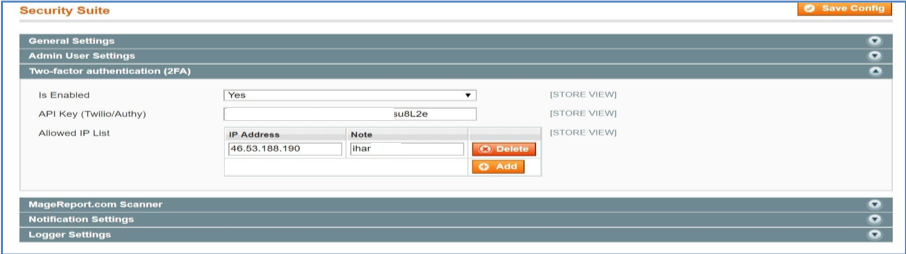
Let in only verified users into admin panel with 2FA. This is the one the most secure method of identity authentication up to date. What it requests is a phone number to be assigned to a user that has access to admin panel. During every login attempt, after the username and password are correct, the system sends the users an automatically generated SMS-code in order to login in Magento Admin panel. While the password is the first factor of confirming identity, the code is the second one. Even if the password fraud has taken place, 2FA is a serious obstacle to any intrusion. You can find the 2FA settings at System > Configuration > [NEKLO] Security Suite > Two-factor authentication (2FA) tab.
- The preferable mode for the 2FA in your admin panel. There are four of them,
you can choose depending on
your preference, or select the mode depending on your preference.
- SMS Code and IP Whitelist add one more factor to the login process, while
“Both” and “Combined” involve both methods.
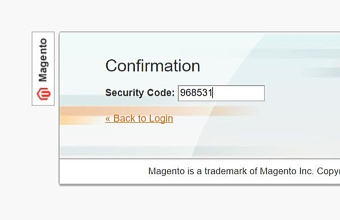
- IP Addresses that are allowed to perform login in
your store admin area. The users with addresses outside
this list won’t be able to log in or will be redirected
to the Confirmation page in ‘Combined’ mode.
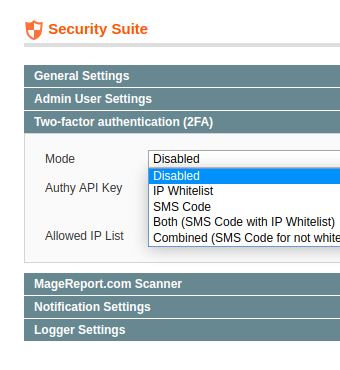
Important note: “Authy IP Key’ is the field necessary for SMS-code verification. To make SMS-code mode work, you have to go through Twilio verification and get an Authy account. You can find a step-by-step instruction to this process in the User Guide for Security Suite extension.
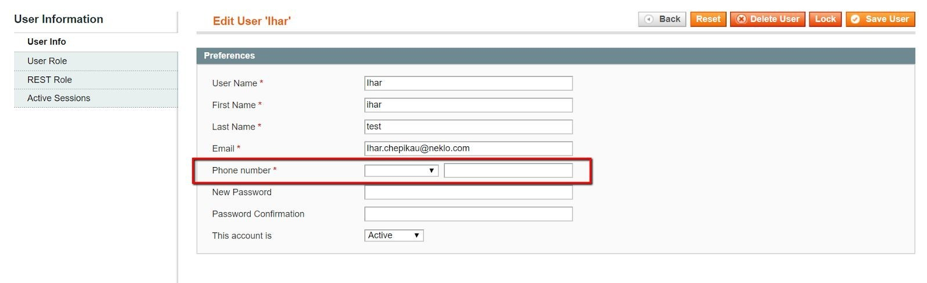
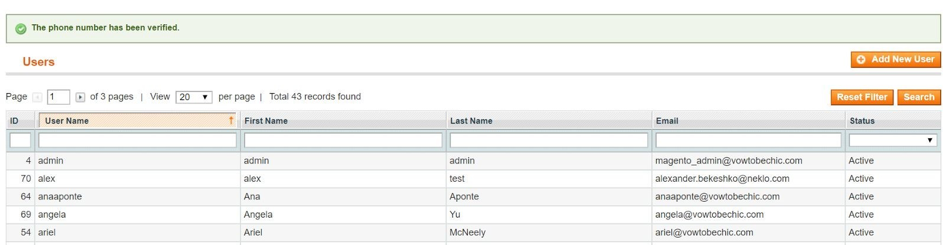
Important note: for SMS confirmation to work, you have to input mobile numbers for each intended user at System > Permissions > Users. 2FA feature must be enabled for ‘Phone Number’ field to appear.
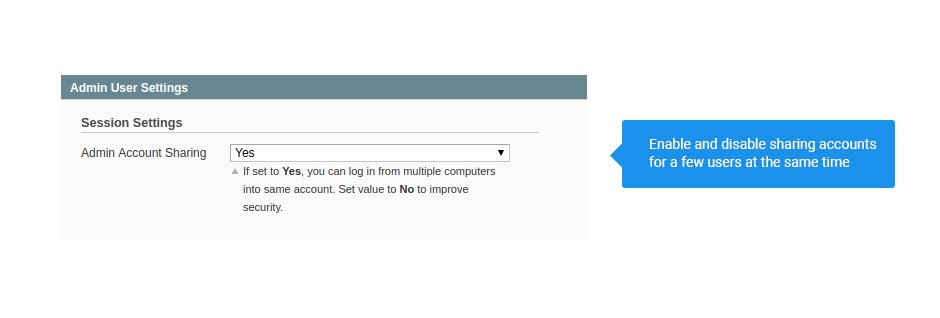
Admin Account Sharing
Don’t leave the chance for intruders to use your admin account. With admin user settings, in ‘Admin Account Sharing’ you can forbid the access to the same account for different people. That means, if you or any other admin user logs in, all the active sessions for this account if there are such, will be momentarily revoked. Any users, that are acting under the same username will be logged out without a possibility to log in back.
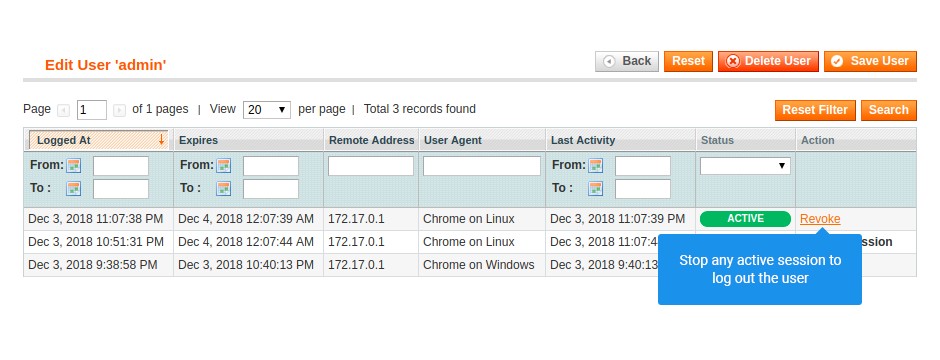
Sessions Grid
Revoke active sessions for other admin users in one click. Sessions is a grid located under System > My Account, where admin users can track all active sessions and their key indicators themselves. If there is a session that seems suspicious for some reason, you can end it by pressing revoke. The user whose session was revoked logs out of Magento instantly and gets the message on the login page that indicates why the session ended.
Active Sessions
Make sure that actions by any admin are appropriate and don’t miss a mistake. You can view all sessions for specific users to determine when they were online, which device they used and which IP address they had. That might be helpful if you have an extensive team or want to keep your watch over their actions tight. The tab is located under System > Permissions > Users. You can choose any user and open their active sessions.
Have a clear vision of your team activity
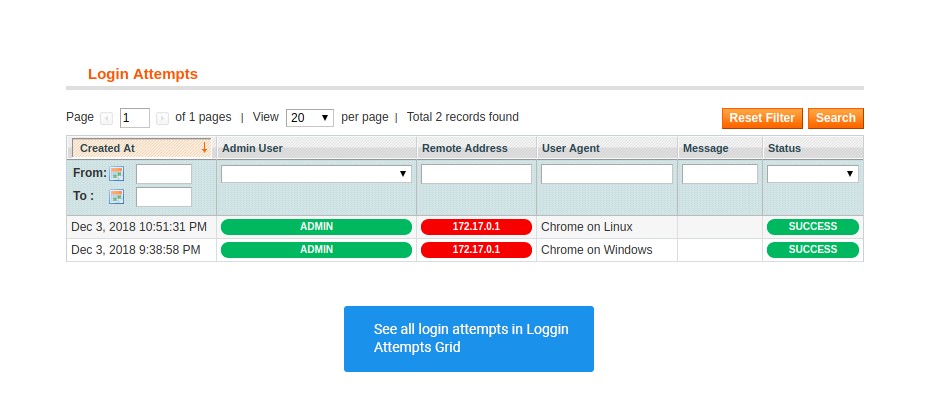
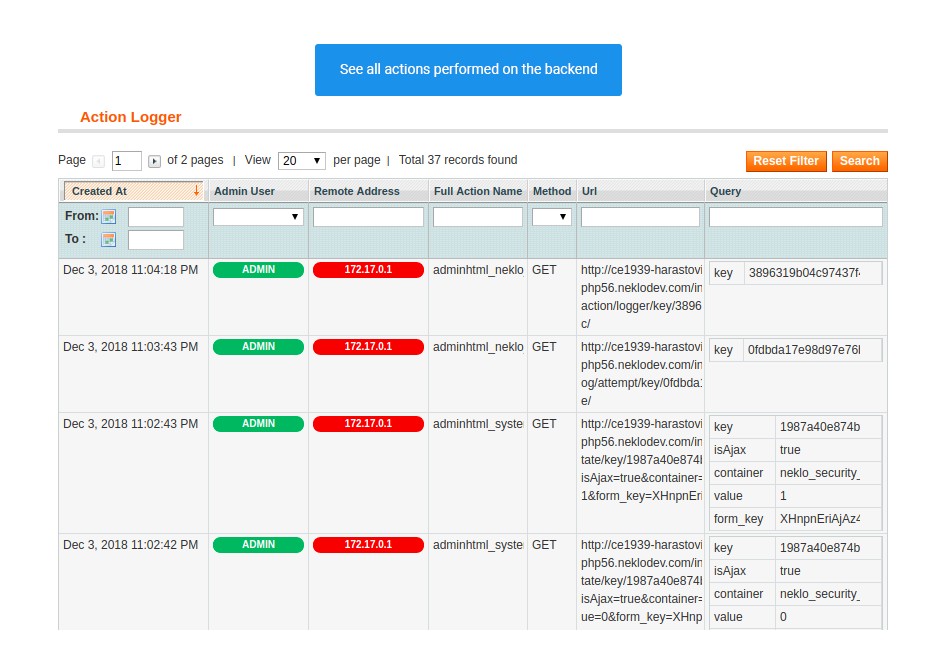
Login Attempts Grid and Action Logger Grid
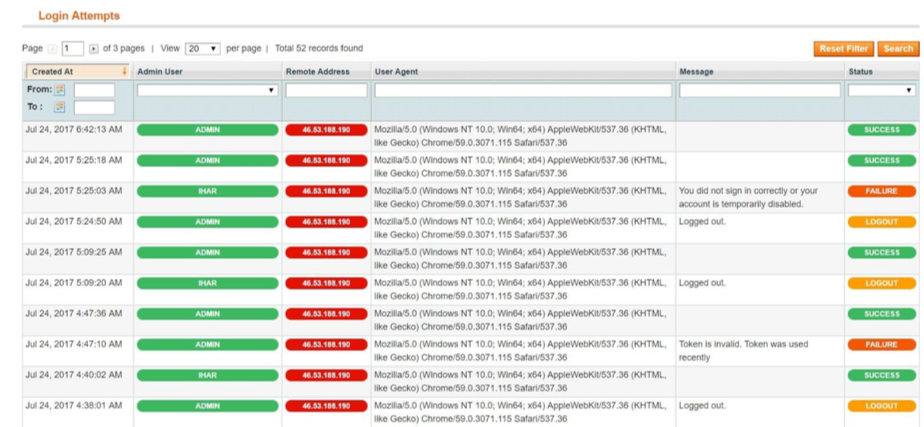
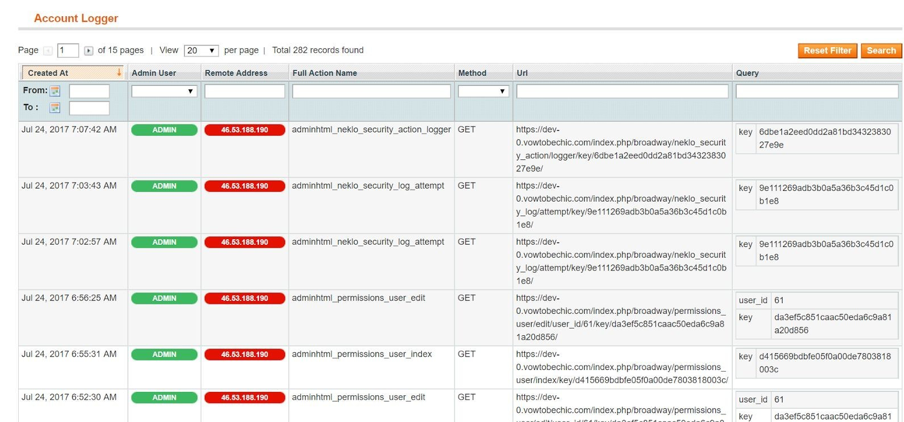
Monitor the work done by your admin users through viewing their login attempts and all other actions in two grids. Both login attempts and actions are specified with multiple filters, that make every event easily trackable. You can track down IP addresses with unsuccessful logins, and determine who did what on the backend.
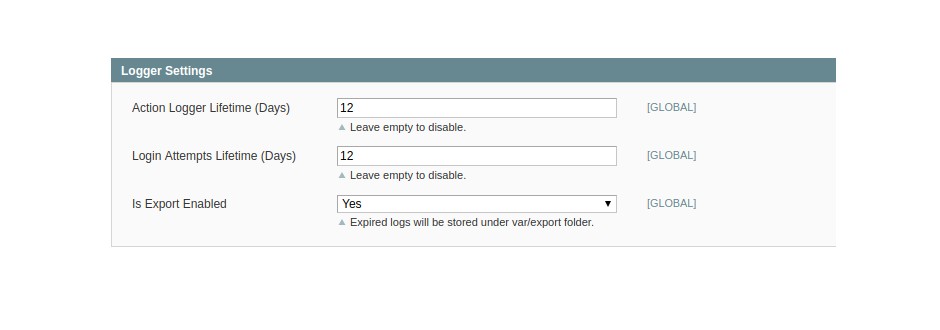
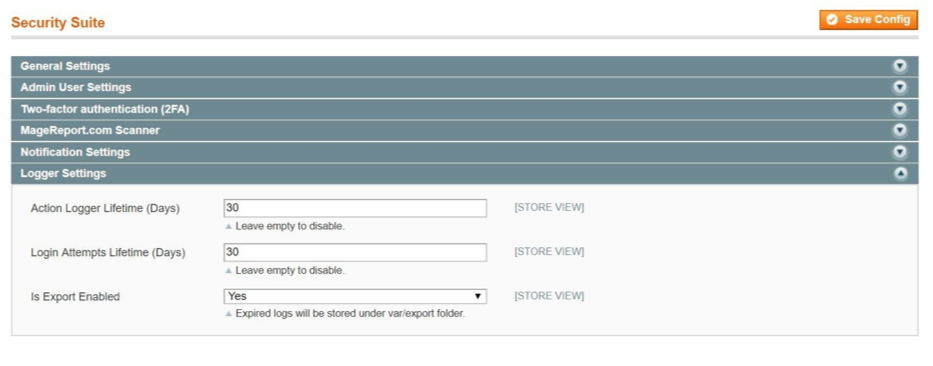
- Set the number of days to save the data in both grids. After the set number expires, the data will be removed from your server automatically.
- Enable export, which will guarantee to save the data to the var/export folder before it is removed, in case you need it later.
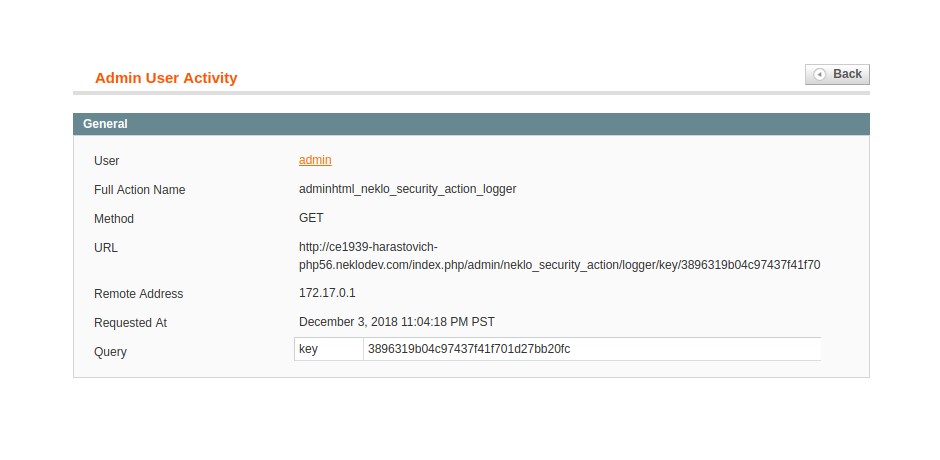
- View every admin action at System > Permissions > Security Suite > Action Logger.
- Control all login attempts and their statuses at System > Permissions > Security Suite > Login Attempts.
Logger Settings
Store and clean the data about admin actions and login attempts on your server. You can control the logs displayed in admin activity grids with variable settings. More specifically, at System > Configuration > [NEKLO] Security Suite > Logger Settings you can:
Make your Magento store a safe place to buy
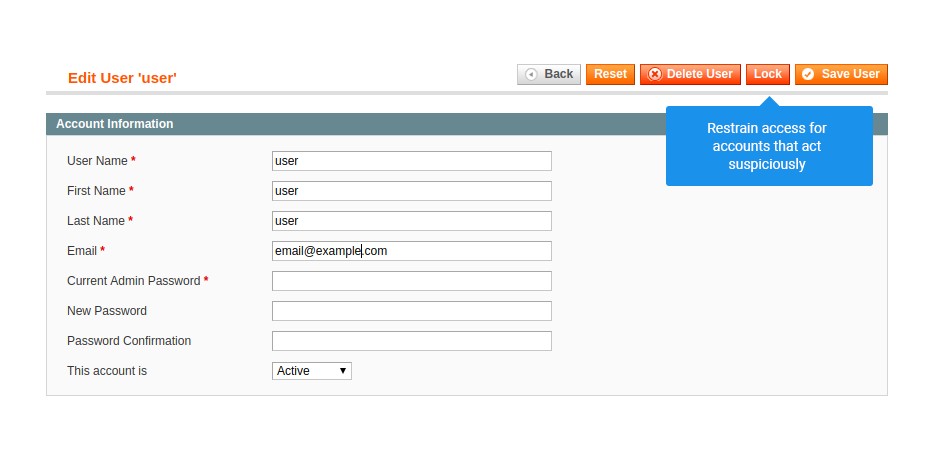
Automatic and Manual User Lockout
Lock or unlock any user manually with a new
lock/unlock button in Permission settings. This feature
is a handy tip for when you can lock any user, not only the
ones that get the password wrong. All you have to do is to go
to System > Permissions > Users and find the user that you need to
lock out. The block is permanent until you unblock the user the
same way.
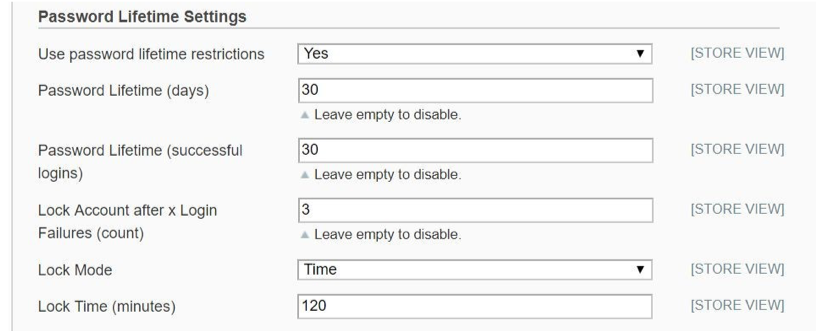
Lock admin users out automatically without your participation
with lockout settings. Located at System > Configuration > [NEKLO]
> Security Suite > Admin User Settings tab, they allow you to configure:
- If the lockout is limited, how many minutes it lasts.
- Determine the type of lockout: is it a time period in minutes or a permanent block.
- How many times a user can enter the wrong password before they will be locked out, i.e. blocked from any access to Magento Admin Panel.
- The minimum number of symbols the password must contain to be valid.
- If it is necessary for the symbols in the password to be in different cases.
- If the password must contain digits.
- If the password must contain any special characters besides numbers and letters.
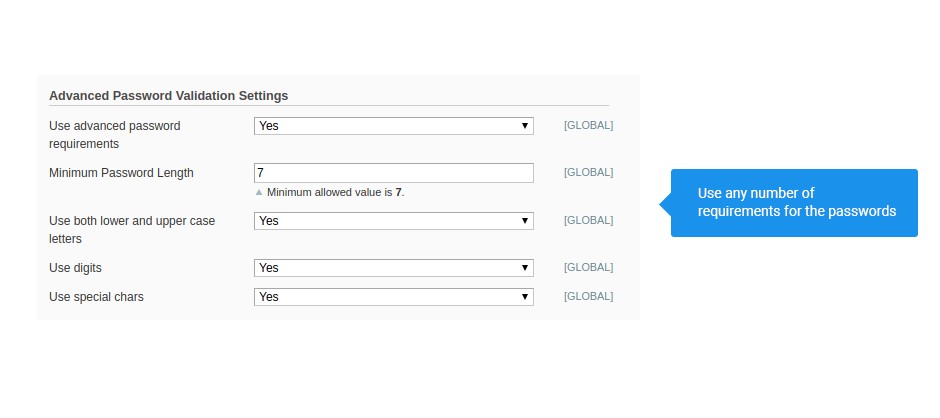
Advanced Password Validation Settings
Improve your passwords, because phishing attacks are still
a thing. With Security Suite you are able to choose minimum
password length, enable the use of lower and uppercase letters
and digits in a set of advanced settings.
The password settings are located at System > Configuration > [NEKLO]
> Security Suite > Admin User Settings > Advanced Password Validation
Settings tab. To adjust the value according to how you want the passwords
to be, enable advanced requirements.
There are four more specifications that you can add to what
you have at the moment:
Jump to Page button
This feature is intended for taking your products from one page and moving it to another. The button opens a window where you specify the page you want to send the product to. The transferred product will appear on the first available position, of the very first place on the page is taken by a pinned product.
A tip for strong passwords: set all the settings to ‘yes’ or use a maximum possible value that you are able to implement with your team. Unpredictable passwords are harder to oversee, overhear or copy, or to put simply, are physically and technically harder to cheat.
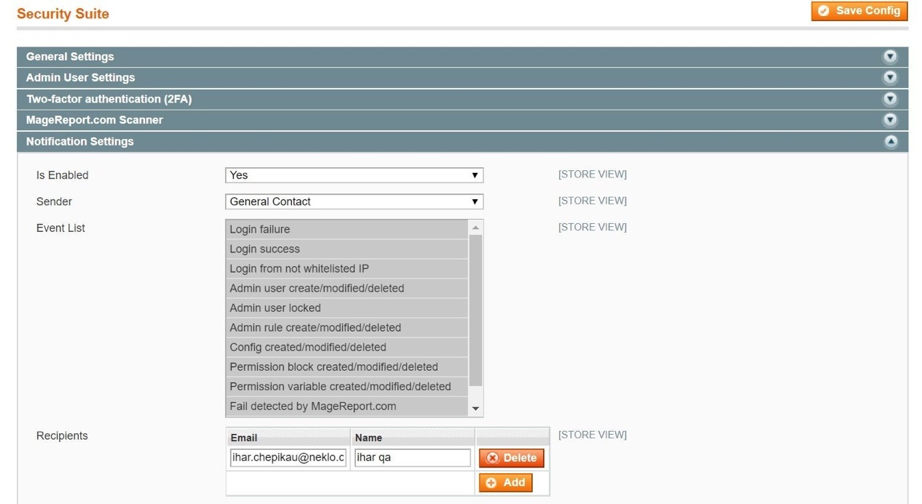
Be warned about possible security issues
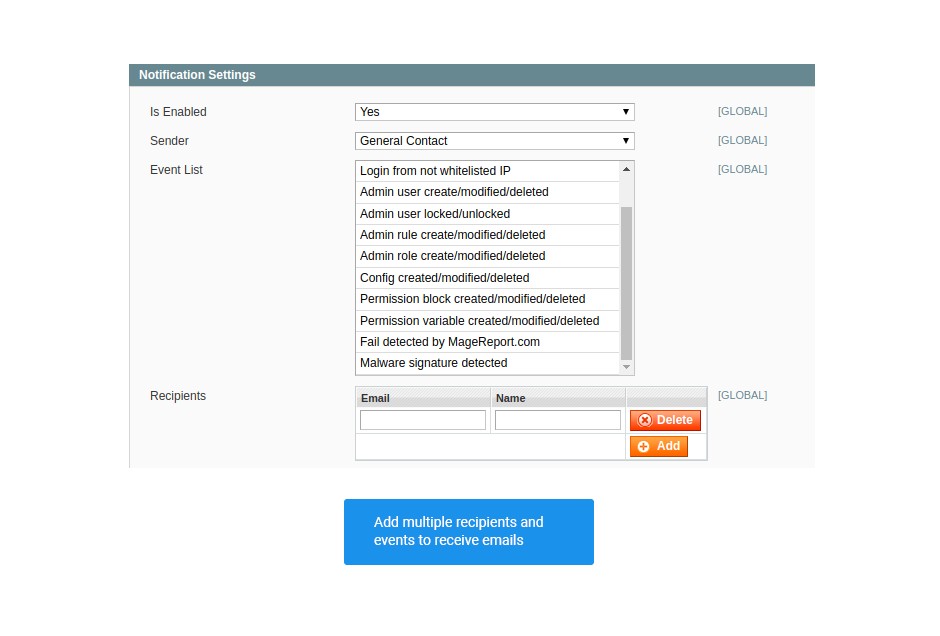
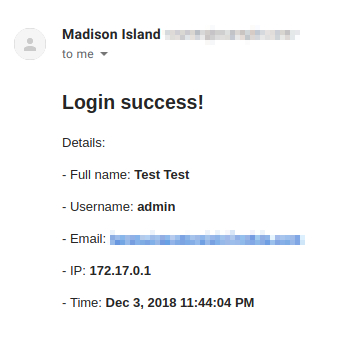
Get email notifications about what is happening at the backend of your Magento. You will know instantly if there are new admin users, unsuccessful logins or suspicious attempts to gain access, and will be able to fix The event list includes Login success, Login failure, Login from not whitelisted IP, Admin user created/modified/deleted, Admin user locked and a few more activities. After you enable the feature, you get three more fields.
Notification Settings
- Sender specification, where you choose the contact to send the emails from.
- Event list, in which you choose the events you would like to know about.
- You can add multiple recipients, having only the email address and the username. It can be any user you want to have access to important events.
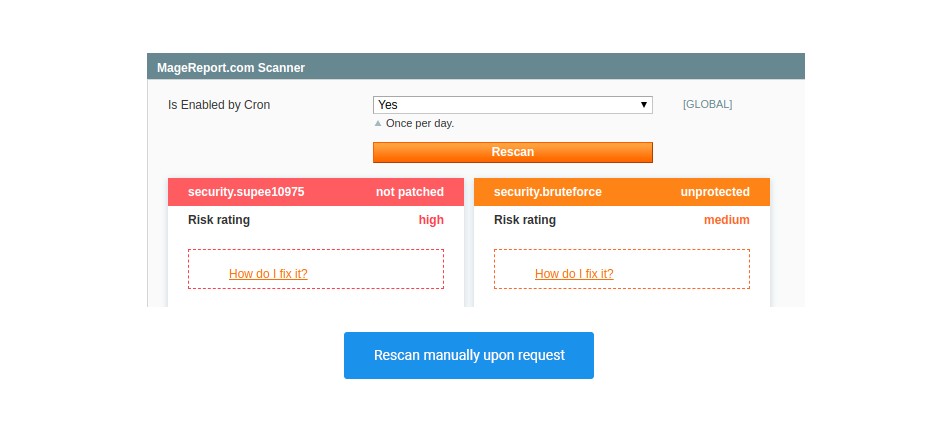
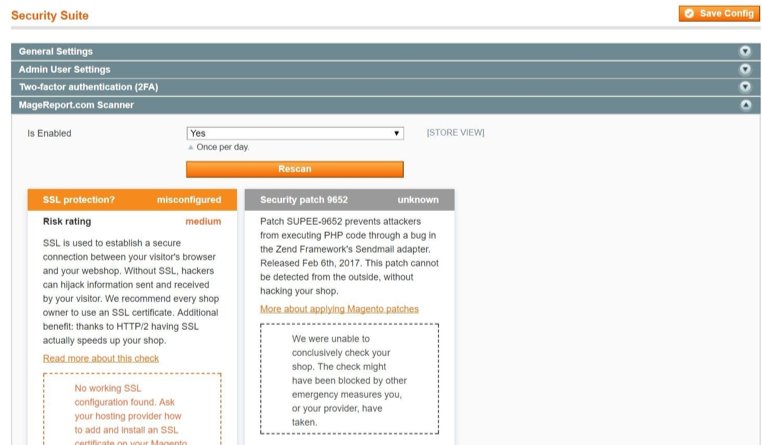
MageReport built-in scanner
Scan your store by MageReport as frequently as you need. Receive information about missing Magento security patches, unmaintained servers and attack risks. The scanner itself and the results of the scanning are located at System > Configuration > [NEKLO] Security Suite > MageReport.com Scanner.
- After scanning, you get the latest report at the same page with the links to materials that can help.
- Rescan is completed once in 24 hours. You can initiate the rescan
on your own manually at any time by pressing the rescan button.
The results will be displayed in the Magento Admin panel.
How to install Security Suite extension for Magento 1?
To execute a correct installation an extension for Magento 1,
you need to have valid FTP/SSH access details.
Attention! It is necessary to disable code
compilation before you start installing the extension.
If this setting is left enabled, the extension installation
can make your site inaccessible. To turn off code compilation,
go to your admin panel > System > Tools > Compilation and click
“Disable”.
1. Unpack a zip file you have downloaded.
2. Upload all files from the downloaded zip file to the root
folder of your Magento 1 installation.
3. In your admin panel, go to System > Cache Management
and flush Magento cache. This step is obligatory.
4. Bring code compilation back by turning it on at System >
Tools > Compilation, when the extension was successfully installed.
5. Log out and in your Magento. That action will reload ACL
(account control level) rules.
6. To enable the extension and start configuring, go to System
> Configuration > Neklo tab, choose Security Suite and select “Yes” value in General Settings, then save the changes.
Frequently Asked Questions
2. Unpack the archive purchased from our Magento Store and copy the contents of the ‘extension’ folder to the root folder of your Magento installation.
3. Log out from Magento Admin panel if you are logged in and then log back.
4. Clear the cache. If Cache Control is enabled in Magento go to ‘System > Cache Management’ section, select ‘Refresh’ under ‘All Cache’ drop-down menu and press ‘Save Cache Settings’.
5. Go to ‘System > Configuration > NEKLO tab > Extensions & Contact’ section and check the list of extensions installed for the name of your purchased extension. If it is in the list the installation is complete.
In case your stores run on separate live Magento installations, you need to buy an extension for each of them.
And now, please, follow these steps:
1. Open app/etc/local.xml
2. Replace
<disable_local_modules>false</disable_local_modules> with
<disable_local_modules>true</disable_local_modules>
3. Log in to admin panel and disable the compilation.
4. Revert the changes in the local.xml
5. Clear the cache.
1. Edit … file (where XXX stands for the extension name/code).
2. Change "true" to "false".
3. Clear the cache.
At this point the extension is completely disabled and is not visible for Magento.
Now you can safely remove the extension files, although it is not necessary.
1. Edit app/etc/modules/Neklo_XXX.xml file (where XXX stands for the extension name/code).
2. Change "true" to "false".
3. Clear the cache.
As soon as you have done it the extension is disabled completely, meaning it no longer affects any Magento functionality.
1. Please open app/locale/en_US/ Neklo_XXX.csv, copy it to your locale folder, for example to app/locale/de_DE/ Neklo_XXX.csv and change the wording after the "," so the line will look like "Product review","Testbericht".
2. If there are the necessary language packs installed, you can use inline translation. To do that, please, go to admin/system/configuration/ developer, choose the storeview you want to translate and enable inline translation for it. Then go to the front end, select text and translate.
2. Download the extension (it will be always the latest extension version)
3. Unpack the downloaded folders
4. Disable the Compilation mode in Magento
5. Upload the overwriting existent files of our extensions to Magento root folder (please note that if you customized the files of our extension, the customizations will be overwritten)
6. Refresh site cache (if it\'s enabled)
7. Re-run the Compilation mode
Reasons to choose NEKLO
We have a qualified support team that is always there to help. We look forward to challenges and approach each of them with an open mind and a nonstandard way of thinking. If there is a problem, we know the solution.
We earned the right to be trusted and proud of the work we have done. We completed many tasks and have a lot to come. We have worked on broad range of domains such as e-Business, Supply Chain Management, Pharmaceuticals, Healthcare, Education, Data Warehousing and more.
We deliver solutions that that we know will work. 40% of our developers are Magento, Oracle and Zend certified. We are enthusiastic about what we do, we are the experts in the field of eCommerce and have a portfolio worth a look.